> For the complete documentation index, see [llms.txt](https://help.keyring.app/llms.txt). Markdown versions of documentation pages are available by appending `.md` to page URLs; this page is available as [Markdown](https://help.keyring.app/jp/keyring-hard-wallet/getting-started.md).
# Getting Started
The initial and most crucial step is to ensure that the NFC function on your phone is activated.
Next, follow these steps to activate and back up the KEYRING HARD WALLET.
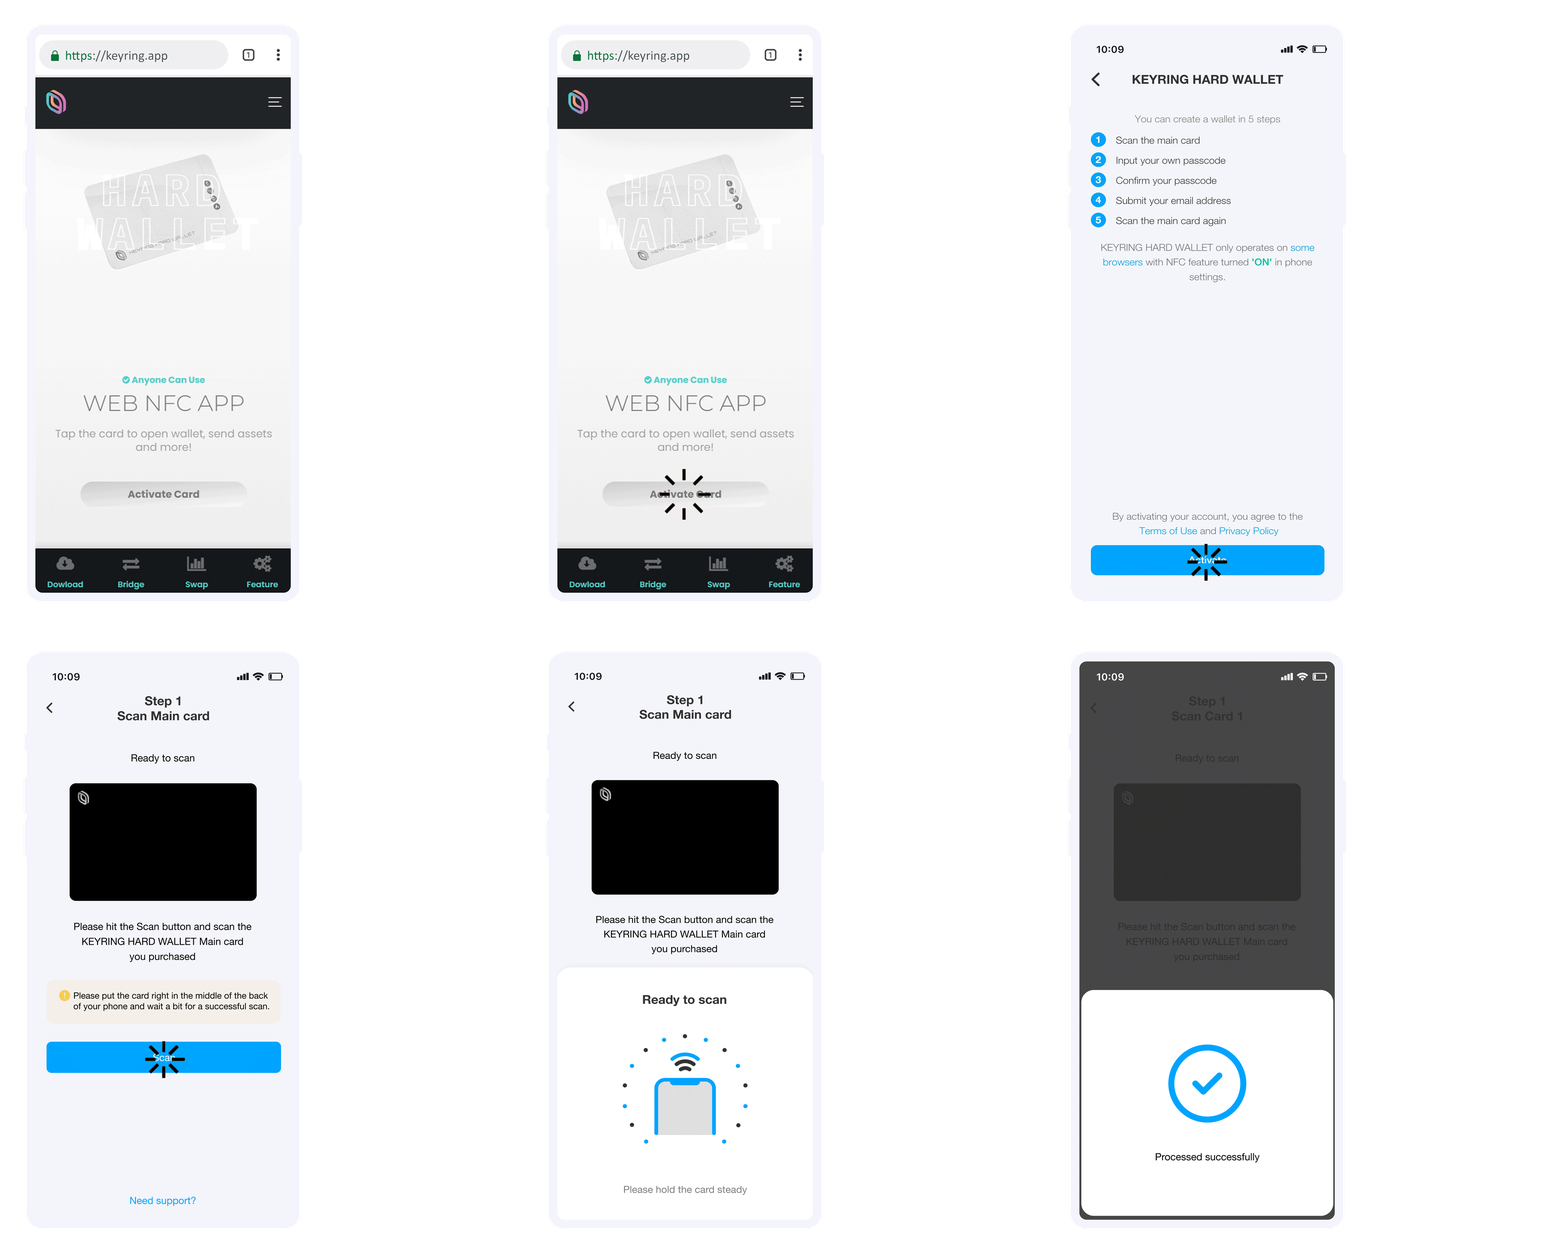
1. Use Chrome, Opera, Samsung Internet, or Android WebView to open **on your phone.**
2. Click on the "**Activate card**" button.
3. Click on "**Activate**"
4. Click on the "**Scan**" button and wait for the "Ready to scan" message to pop up.
5. Scan the card and wait for the process to complete.
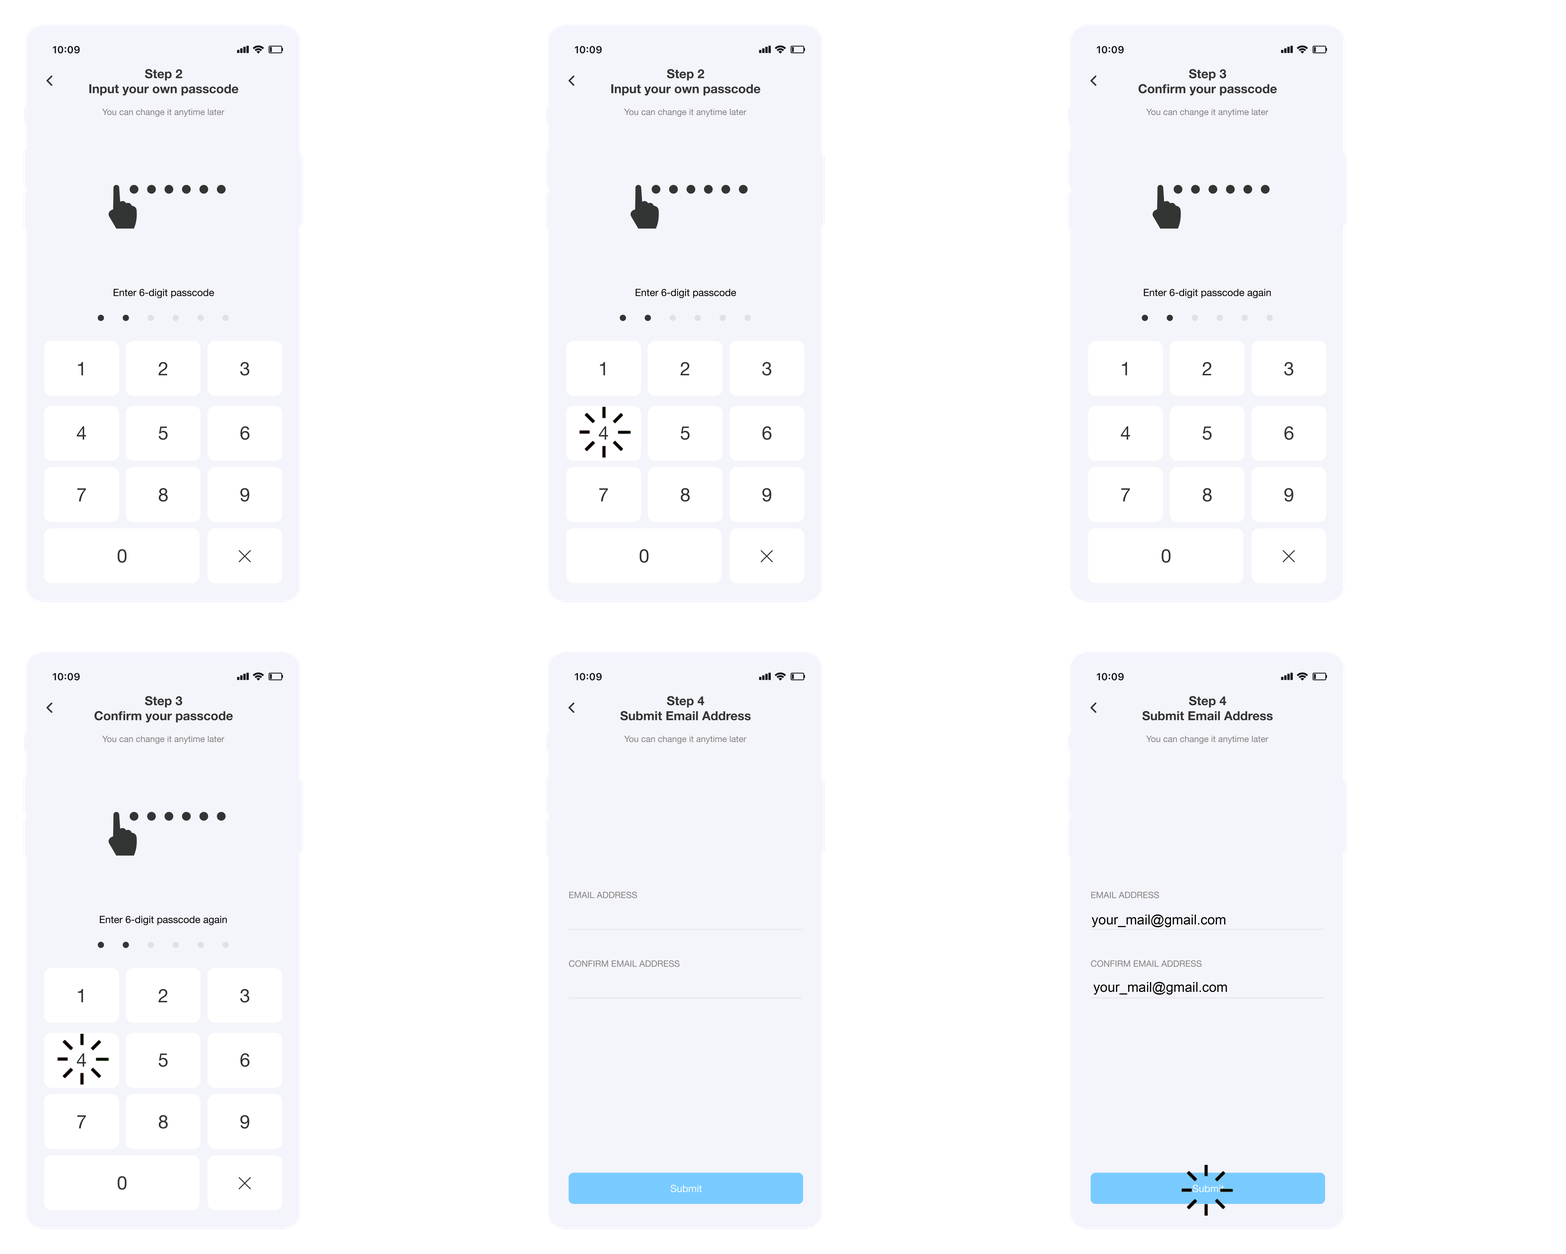
6. Input your passcode.
7. Confirm the passcode.
8. Enter and confirm your Email address. This Email will be used to recover your Passcode.
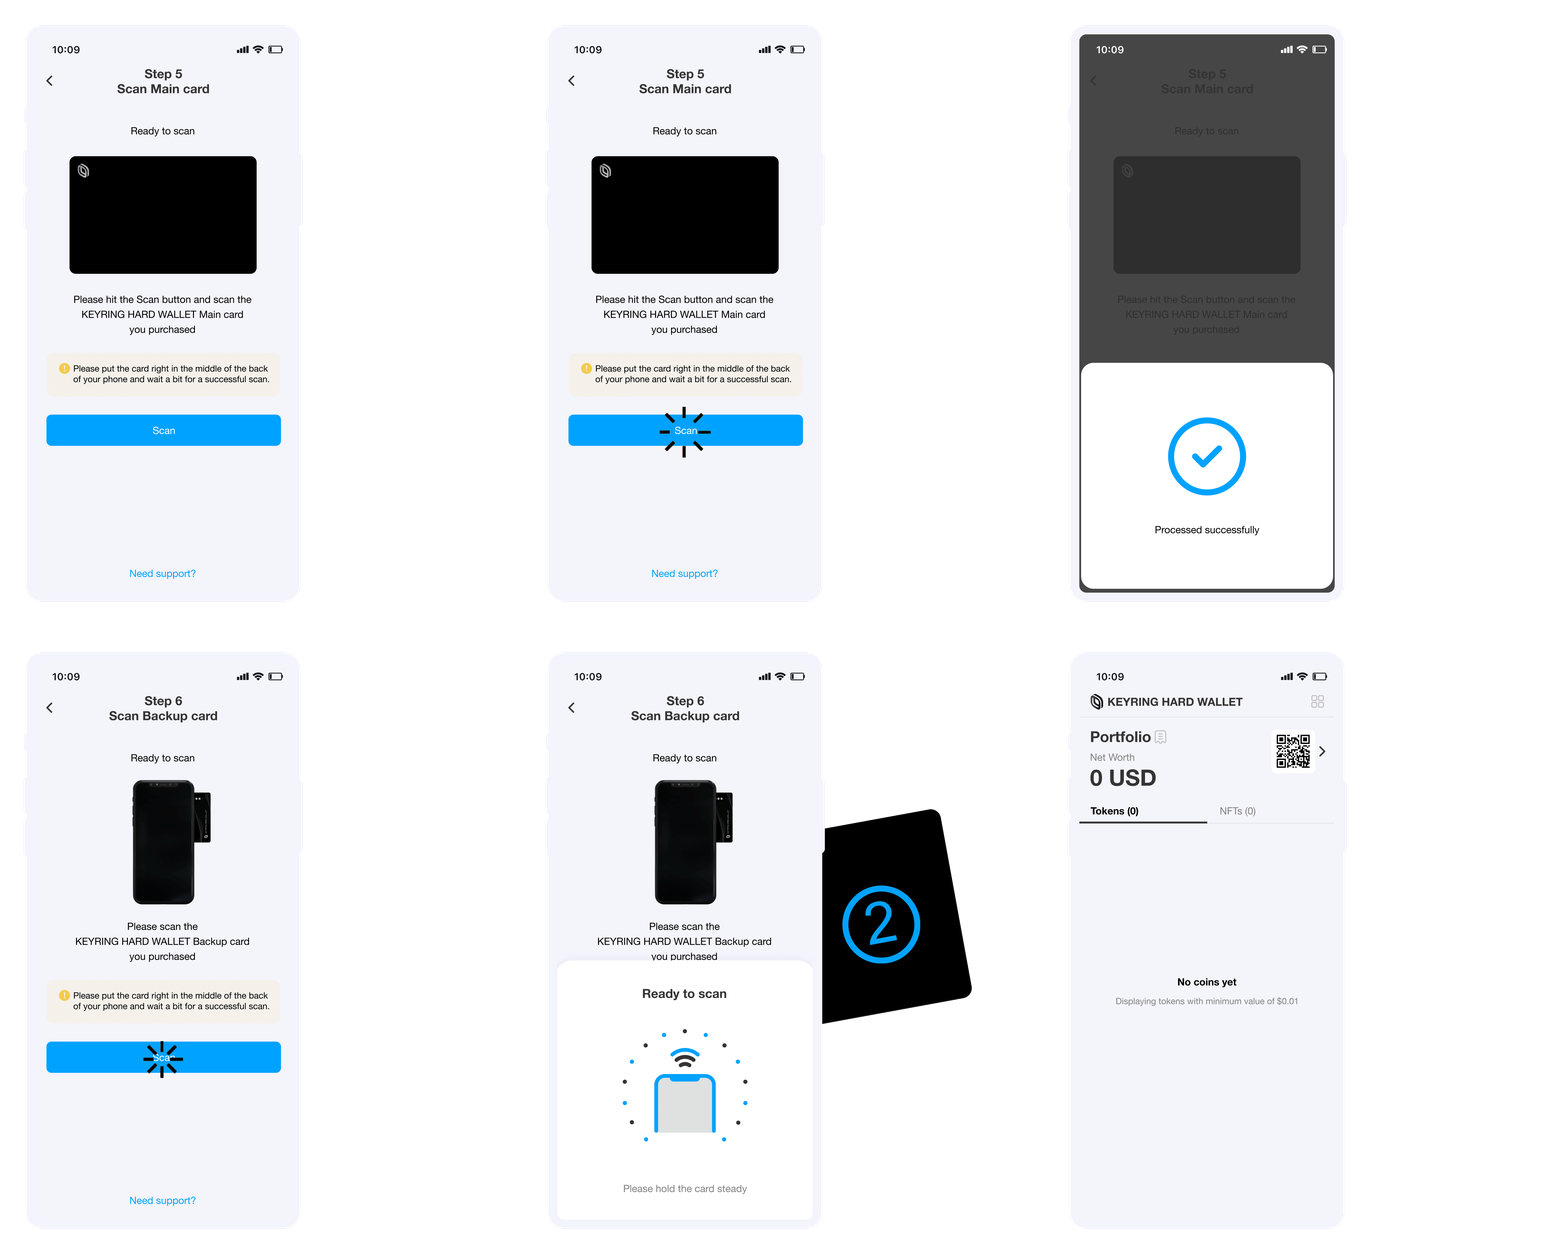
9. Scan your card again to confirm.
10. Next is to set up your main card and backup card.
11. Choose your "**Main card**" and hit the "**Scan main card**" button.
12. Scan the main card.
13. Next is to set up your "**Backup card"** by hitting the "**Scan backup card**" button.
14. Scan the backup card.
Upon purchasing the KEYRING HARD WALLET, you will be provided with two cards.
One can be designated as the Main card, while the other serves as the Backup card.
It is imperative to store both cards securely in a dry and cool environment.